One Button Studio at Home
 Zoom, the University’s free video conferencing platform, can function as a nice remote alternative to the One Button Studio. It can be used in either a synchronous class setting or students can record themselves and share the video after recording. Zoom recordings that students create can easily be turned in to Canvas or taken into a video editor for further refinement. Below are some use cases for employing Zoom as a One Button Studio alternative.

Presentations
Zoom is perfect for having students record presentations which can be submitted to Canvas for review by the instructor and/or peers.

Recorded Lectures
Teaching an online class? Record the lecture in your personal Zoom room quickly and easily and post it up to your course page.

Screen Sharing
Zoom allows for easy screen sharing to provide a way to present PowerPoint, Keynote, Google Slides, Prezi, etc decks to others.

Basic Interviews
Zoom allows for students to record interviews with people both inside and outside the University. This video can be taken into an editing program to be incorporated into a larger project.

Job Interview
Zoom is an excellent way to conduct mock or real job interviews. See this Wired article for best practices when conducting a job interview remotely.

Green Screen
Zoom supports the use of green screen-style backgrounds – still or moving. These recorded clips can either be uploaded on their own or brought into larger video assignments as scenes in other locales.

Language Practice
The best way to build skills while learning a language is to practice speaking. Use Zoom to record skits and review to find areas for improvement.

Pitch Videos
Share a business plan, your research or new product idea by recording a great elevator pitch using Zoom. Upload your recording YouTube and post to Spark to share publicly – or upload to Kaltura and turn in on Canvas for class.
Introducing the Basics
Presentation Practice
Zoom is perfect for having students record presentations – whether rough cuts or final drafts. These videos can be submitted to Canvas for review by the instructor and/or peers, allowing for invaluable feedback that can improve overall public speaking skills.

Getting Started
Set Up Your Meeting
Schedule Meetings (Zoom Support)
Invite Others (Optional)
Inviting Others to Join a Meeting (Zoom Support)
Prepare to Record
Improve Your Lighting
The industry standard studio lighting set-up is 3 point lighting using 3 dedicated lights. At home, the same technique applies, even as the 3 lights become 3 light sources of various types. Whenever possible, ensure the light sources are 45º angles above the subject (you).
High Contrast + Low Light
Keep lighting in mind when choosing shooting locations. Having bright light behind a subject will be distracting and will discolor or “backlight” what you aim to shoot. A camera with auto exposure will compensate for the bright backlight and will leave your subject in the dark.
At Home Lighting Gear
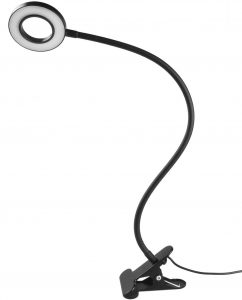 LED Light Ring (Reading Light)
This clip on light offers ten levels of brightness in warm (incandescent), cool (natural) and mixed options, allowing you to adjust your key light source to offset or match the lighting in your home office, living room, etc. An in-line remote makes changing lighting on the fly simple.
The light is powered by USB, meaning it can be plugged into an open port on your computer or into the wall using a regular iOS or Android phone adapter that you have on-hand.
Cost: $20-25
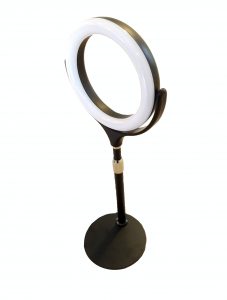 LED Selfie Ring Light (with Stand)
This rotatable ring light also offers ten levels of brightness in warm (incandescent), cool (white), and natural (mixed). This ring light is mounted on an adjustable-height stand and is larger, producing more light, and can act as your Key light. This light also features an in-line remote.
The light is powered by USB, but requires a power block (such as a regular iOS or Android phone adapter) to plug it into the wall which is not included.
Cost: $47-50
Looking for a more sophisticated, affordable lighting set up? Get both and use them as your key and fill lights!
Improve Your Framing
Head Room
When a you are the main subject of a shot like in Zoom, make sure that there is a small amount of space above your head. You don’t want too much space, but you don’t want to cut off your head either.
Click through to compare “do” to “don’t” head room ⤴
Lead Room
For balance within your frames when recording in Zoom, you will want to leave space around yourself that sets a scene and provides visual “breathing room”.
Click through to compare “do” to “don’t” lead room ⤴
Rule of Thirds
The “Rule of Thirds” is the basic composition principle to follow for well balanced and interesting shots. The concept of the Rule of Thirds is to imagine breaking an image down into thirds horizontally and vertically. You will then want to frame your shot so that your elements are along the lines and preferably at one of the four points where the lines intersect to make your shot more interesting.
Click through to see how shot framing can draw interest ⤴
Improve Your Audio
Compare what to do and not do with these two examples ⤴
Be aware of background noise that will end up in your recording. Background noise you do not want can not be fixed easily, even when editing your Zoom video. Audio quality is far more important than most would think since without good audio it will be difficult understand your video.
Starter Microphones
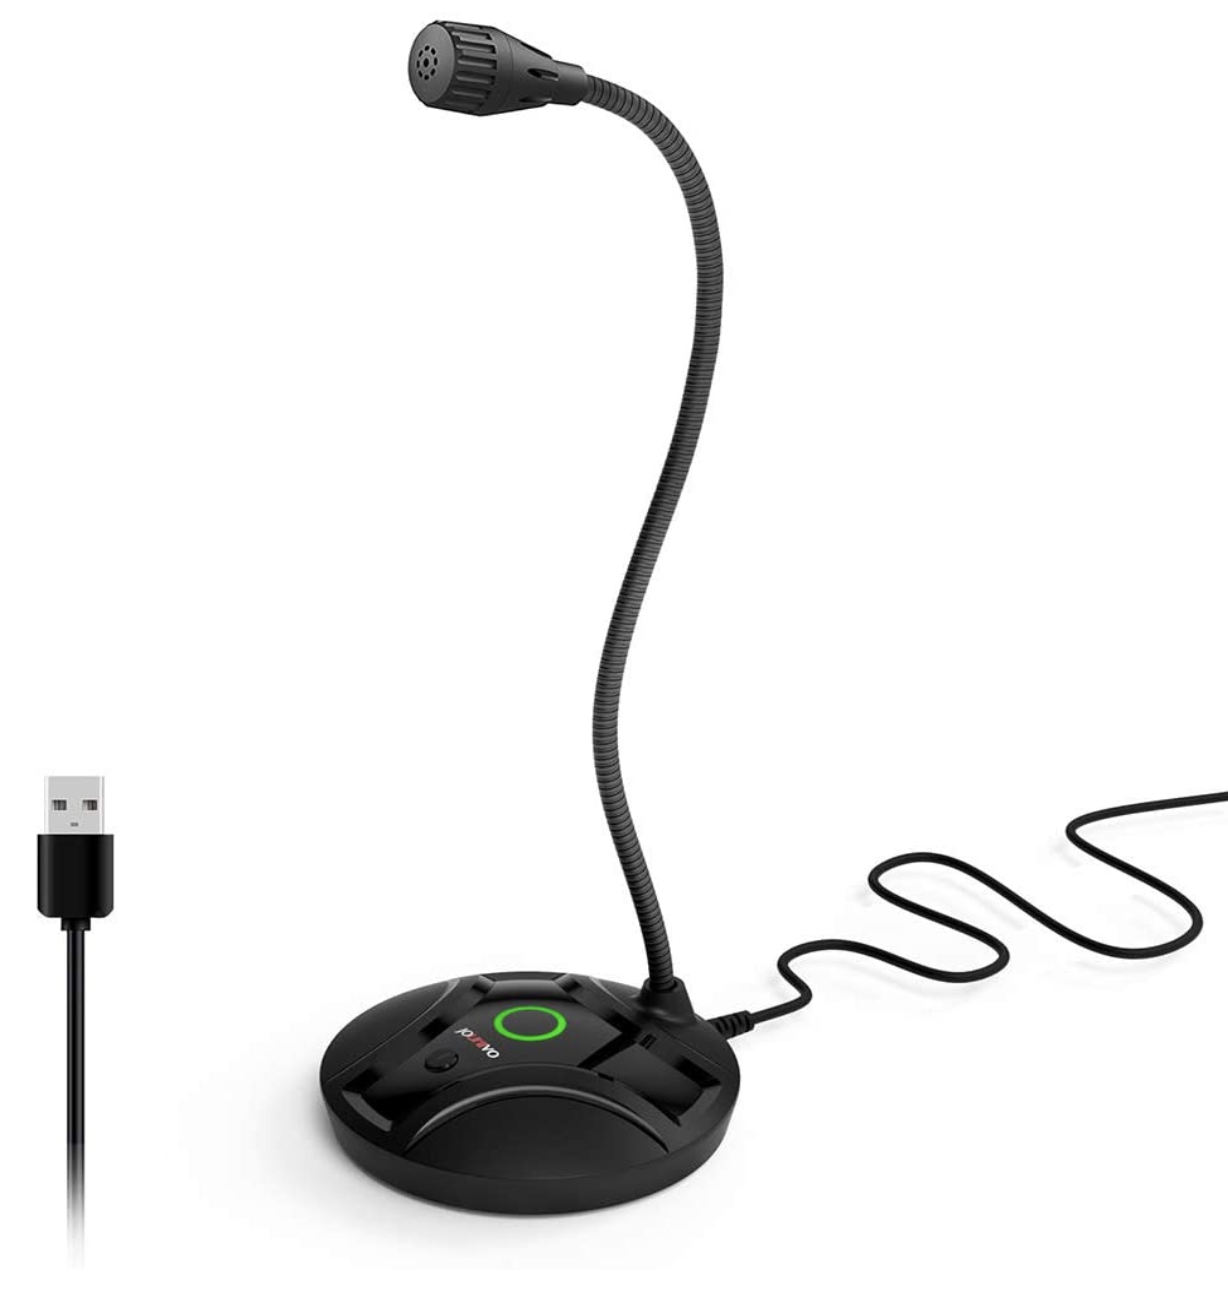 Jounivo USB Mic (Cardioid)
- This USB microphone uses a cardioid pick-up pattern which captures sound sources that are directly in front of the microphone, reducing background noise. It delivers a rich, full-bodied sound and is well-suited for podcasting, Zoom meetings, and voice recording.
- A fully adjustable metal gooseneck pipe makes positioning the microphone for the best possible sound effortless.
- Use one-click to mute/unmute the microphone. A green/red led indicator light reminds you which setting it’s on.
- Plug into your computer’s USB port and start using it with no downloads or installation.
Tutorials
Cost: $19-25
This mic is recommended at this price point, but if it’s not currently available, the mic below is a suitable alternative.
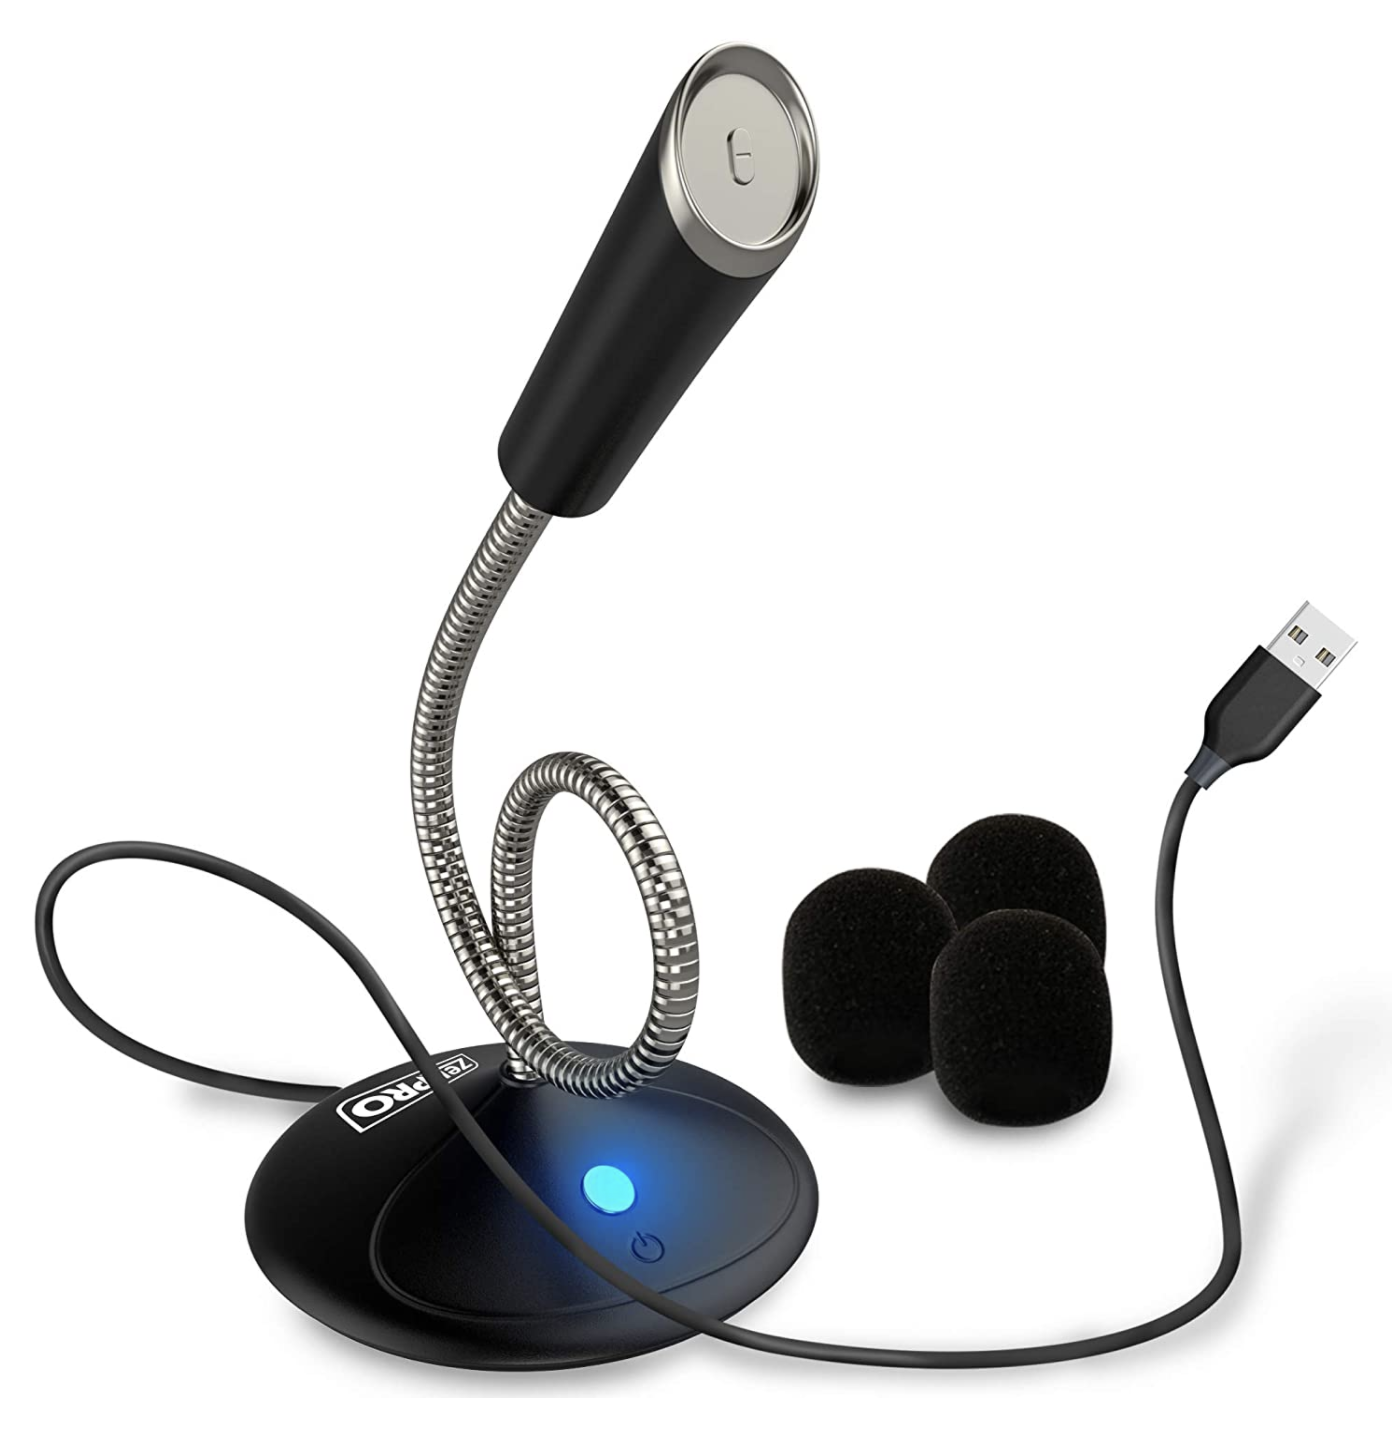 ZekPro USB Mic (Omnidirectional)
- This small USB microphone is a convenient enhancement for voice recording, podcasting, and Zoom meetings. Its omnidirectional pick-up pattern records 360º of sounds which may result in background noise.
- Easily adjust the microphone by its fully adjustable metal gooseneck pipe into a recording position or flat for storage.
- Use one-click to mute/unmute the microphone. Its blue indicator light reminds you which setting it’s on.
- Plug into your computer’s USB port and start using it with no downloads or installation.
- A travel bag and wind foams are included.
Tutorials
Cost: $19-26
Specialized Audio
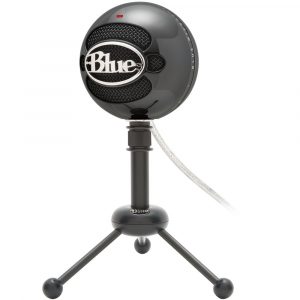
Blue Snowball Condenser Microphone
The same as would be found at many Media Commons editing stations, these microphones do a great job of recording audio for voiceover narration as well as live audio in Zoom sessions. There are three different recording options for speaking, music and meetings, as well.
Tutorials
Cost: $70-90
Improve Your Background
Quick Start Guide: Kaltura (ITLD)
Using (and Making) Virtual Backgrounds
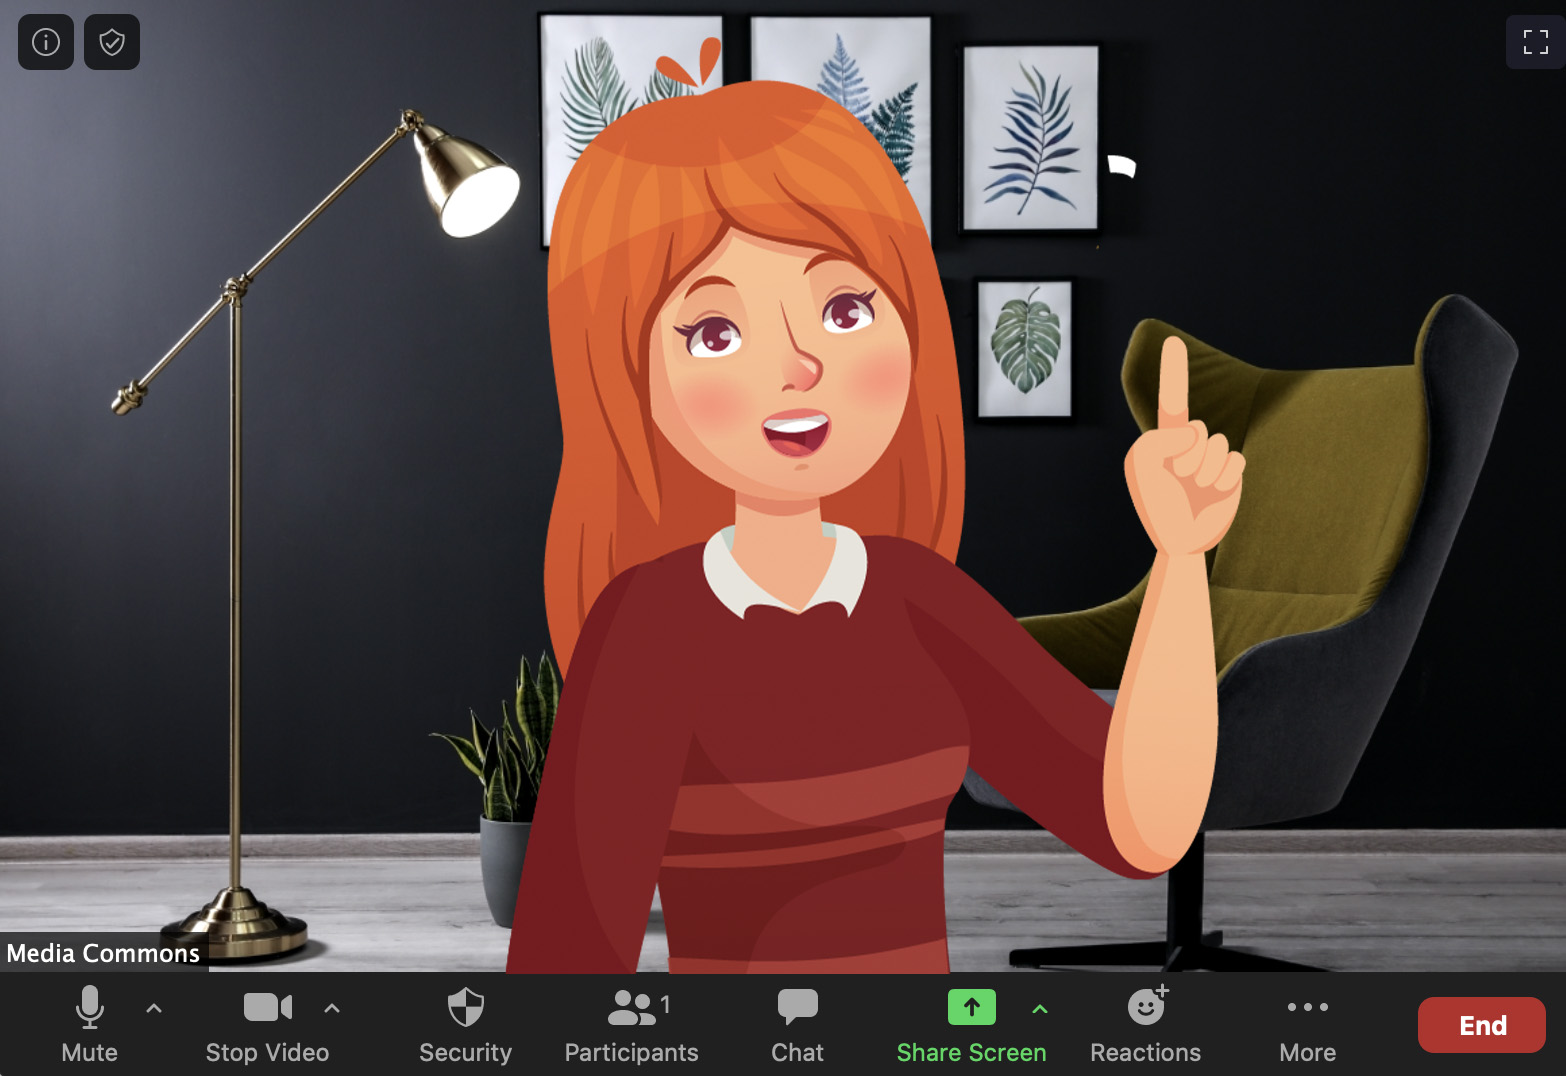
 The virtual background feature allows you to display an image or video as your background during a Zoom Meeting. You can upload your own images or videos as a virtual background, taking the place of green screen in the One Button Studio (with similar results).
Tutorials
Note: If the background conflicts with your movements – or lack thereof, you may be better served by another one or without it.
Recording + Sharing
Recording and Retrieving Zoom Presentations
This tutorial will walk you through recording and retrieving a Zoom presentation.
Zoom is a web application and is accessed at psu.zoom.us. To start your session for recording, go to log in using your Penn State user ID and password.
Once you’re logged in and started your meeting, you will be want to press Record in your Zoom room.

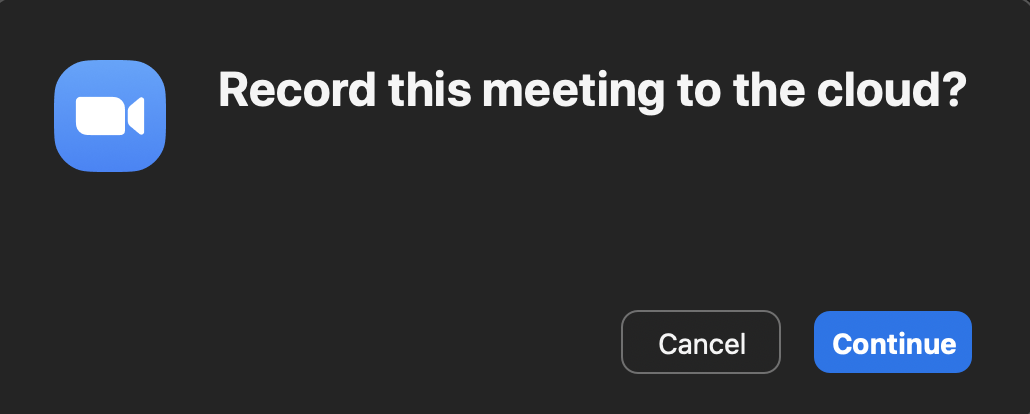
After you click the Record button, a pop-up window will ask if you want to Record this meeting to the cloud. Click Continue.
A notice will appear in the top left corner of your Zoom room. It indicates that you are currently Recording the session. You have the ability to pause and stop the recording from this call out.

When you are finished with your presentation press the square Stop button. Another pop-up window will ask if you want to Stop Cloud Recording. Click Stop Recording.
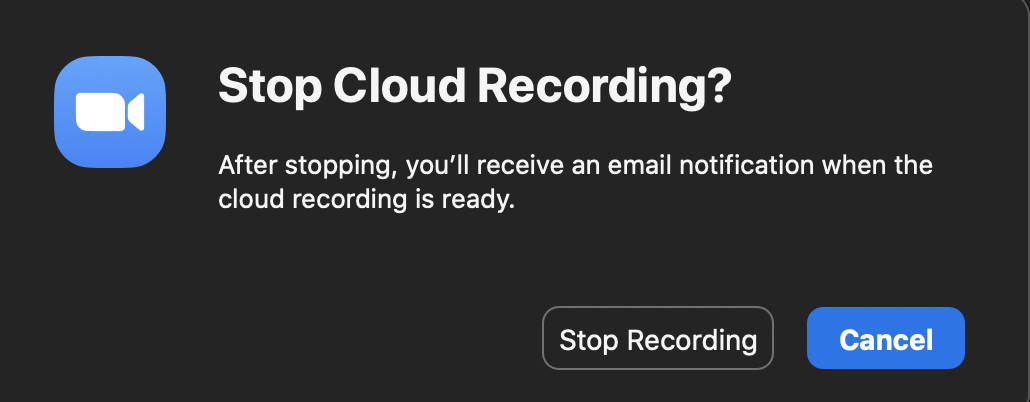
Your meeting recording will be uploaded and processed. When it is ready for playback and sharing, you will receive an email with download links.
Access Zoom Cloud Recordings (IT Knowledge Base)
Sharing a Link to Your Media File (IT Knowledge Base)
Pre-Recorded Lectures
Teaching an online or hybrid class? Informal video is a great way to connect with students in these settings by giving them a sense of your personality and interests. Record an introduction to your teaching or regular housekeeping updates in your personal Zoom room quickly and easily and post it up to your course page on Canvas.

Getting Started
This 49 second example isn’t perfectly scripted – making it effectively engaging ⤴
Prepare to Record
Improve Your Lighting
The industry standard studio lighting set-up is 3 point lighting using 3 dedicated lights. At home, the same technique applies, even as the 3 lights become 3 light sources of various types. Whenever possible, ensure the light sources are 45º angles above the subject (you).
High Contrast + Low Light
Keep lighting in mind when choosing shooting locations. Having bright light behind a subject will be distracting and will discolor or “backlight” what you aim to shoot. A camera with auto exposure will compensate for the bright backlight and will leave your subject in the dark.
At Home Lighting Gear
 LED Light Ring (Reading Light)
This clip on light offers ten levels of brightness in warm (incandescent), cool (natural) and mixed options, allowing you to adjust your key light source to offset or match the lighting in your home office, living room, etc. An in-line remote makes changing lighting on the fly simple.
The light is powered by USB, meaning it can be plugged into an open port on your computer or into the wall using a regular iOS or Android phone adapter that you have on-hand.
Cost: $20-25
 LED Selfie Ring Light (with Stand)
This rotatable ring light also offers ten levels of brightness in warm (incandescent), cool (white), and natural (mixed). This ring light is mounted on an adjustable-height stand and is larger, producing more light, and can act as your Key light. This light also features an in-line remote.
The light is powered by USB, but requires a power block (such as a regular iOS or Android phone adapter) to plug it into the wall which is not included.
Cost: $47-50
Looking for a more sophisticated, affordable lighting set up? Get both and use them as your key and fill lights!
Improve Your Framing
Head Room
When a you are the main subject of a shot like in Zoom, make sure that there is a small amount of space above your head. You don’t want too much space, but you don’t want to cut off your head either.
Click through to compare “do” to “don’t” head room ⤴
Lead Room
For balance within your frames when recording in Zoom, you will want to leave space around yourself that sets a scene and provides visual “breathing room”.
Click through to compare “do” to “don’t” lead room ⤴
Rule of Thirds
The “Rule of Thirds” is the basic composition principle to follow for well balanced and interesting shots. The concept of the Rule of Thirds is to imagine breaking an image down into thirds horizontally and vertically. You will then want to frame your shot so that your elements are along the lines and preferably at one of the four points where the lines intersect to make your shot more interesting.
Click through to see how shot framing can draw interest ⤴
Improve Your Audio
Compare what to do and not do with these two examples ⤴
Be aware of background noise that will end up in your recording. Background noise you do not want can not be fixed easily, even when editing your Zoom video. Audio quality is far more important than most would think since without good audio it will be difficult understand your video.
Starter Microphones
 Jounivo USB Mic (Cardioid)
- This USB microphone uses a cardioid pick-up pattern which captures sound sources that are directly in front of the microphone, reducing background noise. It delivers a rich, full-bodied sound and is well-suited for podcasting, Zoom meetings, and voice recording.
- A fully adjustable metal gooseneck pipe makes positioning the microphone for the best possible sound effortless.
- Use one-click to mute/unmute the microphone. A green/red led indicator light reminds you which setting it’s on.
- Plug into your computer’s USB port and start using it with no downloads or installation.
Tutorials
Cost: $19-25
This mic is recommended at this price point, but if it’s not currently available, the mic below is a suitable alternative.
 ZekPro USB Mic (Omnidirectional)
- This small USB microphone is a convenient enhancement for voice recording, podcasting, and Zoom meetings. Its omnidirectional pick-up pattern records 360º of sounds which may result in background noise.
- Easily adjust the microphone by its fully adjustable metal gooseneck pipe into a recording position or flat for storage.
- Use one-click to mute/unmute the microphone. Its blue indicator light reminds you which setting it’s on.
- Plug into your computer’s USB port and start using it with no downloads or installation.
- A travel bag and wind foams are included.
Tutorials
Cost: $19-26
Specialized Audio

Blue Snowball Condenser Microphone
The same as would be found at many Media Commons editing stations, these microphones do a great job of recording audio for voiceover narration as well as live audio in Zoom sessions. There are three different recording options for speaking, music and meetings, as well.
Tutorials
Cost: $70-90
Improve Your Background

Quick Start Guide: Kaltura (ITLD)
Using (and Making) Virtual Backgrounds
 The virtual background feature allows you to display an image or video as your background during a Zoom Meeting. You can upload your own images or videos as a virtual background, taking the place of green screen in the One Button Studio (with similar results).
Tutorials
Note: If the background conflicts with your movements – or lack thereof, you may be better served by another one or without it.
Share Your Screen
Sharing Your Screen (Zoom Support)
Screensharing in Zoom (IT Knowledge Base)
Sharing Multiple Screens Simultaneously (Zoom Support)
Recording + Sharing
Recording and Retrieving Zoom Presentations
This tutorial will walk you through recording and retrieving a Zoom presentation.
Zoom is a web application and is accessed at psu.zoom.us. To start your session for recording, go to log in using your Penn State user ID and password.
Once you’re logged in and started your meeting, you will be want to press Record in your Zoom room.

After you click the Record button, a pop-up window will ask if you want to Record this meeting to the cloud. Click Continue.

A notice will appear in the top left corner of your Zoom room. It indicates that you are currently Recording the session. You have the ability to pause and stop the recording from this call out.

When you are finished with your presentation press the square Stop button. Another pop-up window will ask if you want to Stop Cloud Recording. Click Stop Recording.

Your meeting recording will be uploaded and processed. When it is ready for playback and sharing, you will receive an email with download links.
Access Zoom Cloud Recordings (IT Knowledge Base)
Sharing a Link to Your Media File (IT Knowledge Base)
Zoom allows for easy screen sharing to provide a way to present PowerPoint, Keynote, Google Slides, Prezi, etc decks to others or work collaboratively by sharing video project drafts and more.

Getting Started
Set Up Your Meeting
Schedule Meetings (Zoom Support)
Invite Others
Inviting Others to Join a Meeting (Zoom Support)
Share Your Screen
Sharing Your Screen (Zoom Support)
Screensharing in Zoom (IT Knowledge Base)
Sharing Multiple Screens Simultaneously (Zoom Support)
Recording + Sharing
Recording and Retrieving Zoom Presentations
Once you’re logged in and started your meeting, you will be want to press Record in your Zoom room.

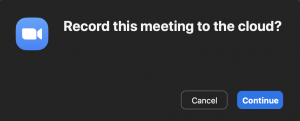
After you click the Record button, a pop-up window will ask if you want to Record this meeting to the cloud. Click Continue.
A notice will appear in the top left corner of your Zoom room. It indicates that you are currently Recording the session. You have the ability to pause and stop the recording from this call out.

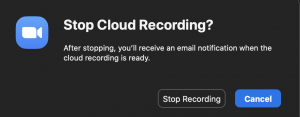
When you are finished with your presentation press the square Stop button. Another pop-up window will ask if you want to Stop Cloud Recording. Click Stop Recording.
Your meeting recording will be uploaded and processed. When it is ready for playback and sharing, you will receive an email with download links.
Access Zoom Cloud Recordings (IT Knowledge Base)
Sharing a Link to Your Media File (IT Knowledge Base)
Sharing via Canvas
Sharing via YouTube
Zoom allows for students to record interviews with people both inside and outside the University, allowing for learning from experts in various fields. This video can be taken into an editing program to be incorporated into a larger project.

Getting Started
Set Up Your Meeting
Schedule Meetings (Zoom Support)
Invite Others
Inviting Others to Join a Meeting (Zoom Support)
Prepare to Interview
Prepare to Connect/Record
Improve Your Lighting
The industry standard studio lighting set-up is 3 point lighting using 3 dedicated lights. At home, the same technique applies, even as the 3 lights become 3 light sources of various types. Whenever possible, ensure the light sources are 45º angles above the subject (you).
High Contrast + Low Light
Keep lighting in mind when choosing shooting locations. Having bright light behind a subject will be distracting and will discolor or “backlight” what you aim to shoot. A camera with auto exposure will compensate for the bright backlight and will leave your subject in the dark.
At Home Lighting Gear
 LED Light Ring (Reading Light)
This clip on light offers ten levels of brightness in warm (incandescent), cool (natural) and mixed options, allowing you to adjust your key light source to offset or match the lighting in your home office, living room, etc. An in-line remote makes changing lighting on the fly simple.
The light is powered by USB, meaning it can be plugged into an open port on your computer or into the wall using a regular iOS or Android phone adapter that you have on-hand.
Cost: $20-25
 LED Selfie Ring Light (with Stand)
This rotatable ring light also offers ten levels of brightness in warm (incandescent), cool (white), and natural (mixed). This ring light is mounted on an adjustable-height stand and is larger, producing more light, and can act as your Key light. This light also features an in-line remote.
The light is powered by USB, but requires a power block (such as a regular iOS or Android phone adapter) to plug it into the wall which is not included.
Cost: $47-50
Looking for a more sophisticated, affordable lighting set up? Get both and use them as your key and fill lights!
When a you are the main subject of a shot like in Zoom, make sure that there is a small amount of space above your head. You don’t want too much space, but you don’t want to cut off your head either.
Improve Your Audio
Compare what to do and not do with these two examples ⤴
Be aware of background noise that will end up in your recording. Background noise you do not want can not be fixed easily, even when editing your Zoom video. Audio quality is far more important than most would think since without good audio it will be difficult understand your video.
Starter Microphones
 Jounivo USB Mic (Cardioid)
- This USB microphone uses a cardioid pick-up pattern which captures sound sources that are directly in front of the microphone, reducing background noise. It delivers a rich, full-bodied sound and is well-suited for podcasting, Zoom meetings, and voice recording.
- A fully adjustable metal gooseneck pipe makes positioning the microphone for the best possible sound effortless.
- Use one-click to mute/unmute the microphone. A green/red led indicator light reminds you which setting it’s on.
- Plug into your computer’s USB port and start using it with no downloads or installation.
Tutorials
Cost: $19-25
This mic is recommended at this price point, but if it’s not currently available, the mic below is a suitable alternative.
 ZekPro USB Mic (Omnidirectional)
- This small USB microphone is a convenient enhancement for voice recording, podcasting, and Zoom meetings. Its omnidirectional pick-up pattern records 360º of sounds which may result in background noise.
- Easily adjust the microphone by its fully adjustable metal gooseneck pipe into a recording position or flat for storage.
- Use one-click to mute/unmute the microphone. Its blue indicator light reminds you which setting it’s on.
- Plug into your computer’s USB port and start using it with no downloads or installation.
- A travel bag and wind foams are included.
Tutorials
Cost: $19-26
Specialized Audio

Blue Snowball Condenser Microphone
The same as would be found at many Media Commons editing stations, these microphones do a great job of recording audio for voiceover narration as well as live audio in Zoom sessions. There are three different recording options for speaking, music and meetings, as well.
Tutorials
Cost: $70-90
Improve Your Framing
Head Room
Click through to compare “do” to “don’t” head room ⤴
Lead Room
For balance within your frames when recording in Zoom, you will want to leave space around yourself that sets a scene and provides visual “breathing room”.
Click through to compare “do” to “don’t” lead room ⤴
Rule of Thirds
The “Rule of Thirds” is the basic composition principle to follow for well balanced and interesting shots. The concept of the Rule of Thirds is to imagine breaking an image down into thirds horizontally and vertically. You will then want to frame your shot so that your elements are along the lines and preferably at one of the four points where the lines intersect to make your shot more interesting.
Click through to see how shot framing can draw interest ⤴
Recording + Sharing
Recording and Retrieving Zoom Presentations
This tutorial will walk you through recording and retrieving a Zoom presentation.
Zoom is a web application and is accessed at psu.zoom.us. To start your session for recording, go to log in using your Penn State user ID and password.
Once you’re logged in and started your meeting, you will be want to press Record in your Zoom room.

After you click the Record button, a pop-up window will ask if you want to Record this meeting to the cloud. Click Continue.

A notice will appear in the top left corner of your Zoom room. It indicates that you are currently Recording the session. You have the ability to pause and stop the recording from this call out.

When you are finished with your presentation press the square Stop button. Another pop-up window will ask if you want to Stop Cloud Recording. Click Stop Recording.

Your meeting recording will be uploaded and processed. When it is ready for playback and sharing, you will receive an email with download links.
Access Zoom Cloud Recordings (IT Knowledge Base)
Sharing a Link to Your Media File (IT Knowledge Base)
Job Interview
Zoom is an excellent way to conduct mock or real job interviews. Whether connecting to a potential employer, student peer or instructor live or recording answers to questions and sharing, it’s possible to enhance the interview and place an emphasis on the content rather than the remote meeting context.

Getting Started
The title says it all and the video will get you ready to interview remotely ⤴
Prepare to Connect/Record
Improve Your Lighting
The industry standard studio lighting set-up is 3 point lighting using 3 dedicated lights. At home, the same technique applies, even as the 3 lights become 3 light sources of various types. Whenever possible, ensure the light sources are 45º angles above the subject (you).
High Contrast + Low Light
Keep lighting in mind when choosing shooting locations. Having bright light behind a subject will be distracting and will discolor or “backlight” what you aim to shoot. A camera with auto exposure will compensate for the bright backlight and will leave your subject in the dark.
At Home Lighting Gear
 LED Light Ring (Reading Light)
This clip on light offers ten levels of brightness in warm (incandescent), cool (natural) and mixed options, allowing you to adjust your key light source to offset or match the lighting in your home office, living room, etc. An in-line remote makes changing lighting on the fly simple.
The light is powered by USB, meaning it can be plugged into an open port on your computer or into the wall using a regular iOS or Android phone adapter that you have on-hand.
Cost: $20-25
 LED Selfie Ring Light (with Stand)
This rotatable ring light also offers ten levels of brightness in warm (incandescent), cool (white), and natural (mixed). This ring light is mounted on an adjustable-height stand and is larger, producing more light, and can act as your Key light. This light also features an in-line remote.
The light is powered by USB, but requires a power block (such as a regular iOS or Android phone adapter) to plug it into the wall which is not included.
Cost: $47-50
Looking for a more sophisticated, affordable lighting set up? Get both and use them as your key and fill lights!
When a you are the main subject of a shot like in Zoom, make sure that there is a small amount of space above your head. You don’t want too much space, but you don’t want to cut off your head either.
Improve Your Audio
Compare what to do and not do with these two examples ⤴
Be aware of background noise that will end up in your recording. Background noise you do not want can not be fixed easily, even when editing your Zoom video. Audio quality is far more important than most would think since without good audio it will be difficult understand your video.
Starter Microphones
 Jounivo USB Mic (Cardioid)
- This USB microphone uses a cardioid pick-up pattern which captures sound sources that are directly in front of the microphone, reducing background noise. It delivers a rich, full-bodied sound and is well-suited for podcasting, Zoom meetings, and voice recording.
- A fully adjustable metal gooseneck pipe makes positioning the microphone for the best possible sound effortless.
- Use one-click to mute/unmute the microphone. A green/red led indicator light reminds you which setting it’s on.
- Plug into your computer’s USB port and start using it with no downloads or installation.
Tutorials
Cost: $19-25
This mic is recommended at this price point, but if it’s not currently available, the mic below is a suitable alternative.
 ZekPro USB Mic (Omnidirectional)
- This small USB microphone is a convenient enhancement for voice recording, podcasting, and Zoom meetings. Its omnidirectional pick-up pattern records 360º of sounds which may result in background noise.
- Easily adjust the microphone by its fully adjustable metal gooseneck pipe into a recording position or flat for storage.
- Use one-click to mute/unmute the microphone. Its blue indicator light reminds you which setting it’s on.
- Plug into your computer’s USB port and start using it with no downloads or installation.
- A travel bag and wind foams are included.
Tutorials
Cost: $19-26
Specialized Audio

Blue Snowball Condenser Microphone
The same as would be found at many Media Commons editing stations, these microphones do a great job of recording audio for voiceover narration as well as live audio in Zoom sessions. There are three different recording options for speaking, music and meetings, as well.
Tutorials
Cost: $70-90
Improve Your Framing
Head Room
Click through to compare “do” to “don’t” head room ⤴
Lead Room
For balance within your frames when recording in Zoom, you will want to leave space around yourself that sets a scene and provides visual “breathing room”.
Click through to compare “do” to “don’t” lead room ⤴
Rule of Thirds
The “Rule of Thirds” is the basic composition principle to follow for well balanced and interesting shots. The concept of the Rule of Thirds is to imagine breaking an image down into thirds horizontally and vertically. You will then want to frame your shot so that your elements are along the lines and preferably at one of the four points where the lines intersect to make your shot more interesting.
Click through to see how shot framing can draw interest ⤴
Recording + Sharing (with Employer, Peer or for Class)
Recording and Retrieving Zoom Presentations
Once you’re logged in and started your meeting, you will be want to press Record in your Zoom room.

After you click the Record button, a pop-up window will ask if you want to Record this meeting to the cloud. Click Continue.

A notice will appear in the top left corner of your Zoom room. It indicates that you are currently Recording the session. You have the ability to pause and stop the recording from this call out.

When you are finished with your presentation press the square Stop button. Another pop-up window will ask if you want to Stop Cloud Recording. Click Stop Recording.

Your meeting recording will be uploaded and processed. When it is ready for playback and sharing, you will receive an email with download links.
Access Zoom Cloud Recordings (IT Knowledge Base)
Sharing a Link to Your Media File (IT Knowledge Base)
Sharing via Canvas
Sharing via YouTube
Green Screen
Zoom supports the use of green screen-style backgrounds – still or moving – allowing content creators to place themselves literally anywhere. These recorded clips can either be uploaded on their own to Canvas, YouTube, etc or brought into larger video assignments as scenes in other locales.

Getting Started
Check out the intro to Virtual Backgrounds from Zoom ⤴
Set Up Your Meeting
Schedule Meetings (Zoom Support)
Invite Others
Inviting Others to Join a Meeting (Zoom Support)
Prepare to Record
Change Your Background
 The virtual background feature allows you to display an image or video as your background during a Zoom Meeting. You can upload your own images or videos as a virtual background, taking the place of green screen in the One Button Studio (with similar results).
Tutorials
Note: If the background conflicts with your movements – or lack thereof, you may be better served by another one.
Recording + Sharing
Recording and Retrieving Zoom Presentations
This tutorial will walk you through recording and retrieving a Zoom presentation.
Zoom is a web application and is accessed at psu.zoom.us. To start your session for recording, go to log in using your Penn State user ID and password.
Once you’re logged in and started your meeting, you will be want to press Record in your Zoom room.

After you click the Record button, a pop-up window will ask if you want to Record this meeting to the cloud. Click Continue.

A notice will appear in the top left corner of your Zoom room. It indicates that you are currently Recording the session. You have the ability to pause and stop the recording from this call out.

When you are finished with your presentation press the square Stop button. Another pop-up window will ask if you want to Stop Cloud Recording. Click Stop Recording.

Your meeting recording will be uploaded and processed. When it is ready for playback and sharing, you will receive an email with download links.
Access Zoom Cloud Recordings (IT Knowledge Base)
Sharing a Link to Your Media File (IT Knowledge Base)
Language Practice
The best way to build skills while learning a language is to practice speaking. Use Zoom to record skits that allow for application of lesson vocabulary and, while reviewing, to find areas for usage and pronunciation improvement. Or arrange to meet with a native speaker to bolster listening comprehension and foster connection to the culture.

Getting Started
Set Up Your Meeting
Schedule Meetings (Zoom Support)
Invite Others
Inviting Others to Join a Meeting (Zoom Support)
Prepare to Record
Improve Your Lighting
The industry standard studio lighting set-up is 3 point lighting using 3 dedicated lights. At home, the same technique applies, even as the 3 lights become 3 light sources of various types. Whenever possible, ensure the light sources are 45º angles above the subject (you).
High Contrast + Low Light
Keep lighting in mind when choosing shooting locations. Having bright light behind a subject will be distracting and will discolor or “backlight” what you aim to shoot. A camera with auto exposure will compensate for the bright backlight and will leave your subject in the dark.
At Home Lighting Gear
 LED Light Ring (Reading Light)
This clip on light offers ten levels of brightness in warm (incandescent), cool (natural) and mixed options, allowing you to adjust your key light source to offset or match the lighting in your home office, living room, etc. An in-line remote makes changing lighting on the fly simple.
The light is powered by USB, meaning it can be plugged into an open port on your computer or into the wall using a regular iOS or Android phone adapter that you have on-hand.
Cost: $20-25
 LED Selfie Ring Light (with Stand)
This rotatable ring light also offers ten levels of brightness in warm (incandescent), cool (white), and natural (mixed). This ring light is mounted on an adjustable-height stand and is larger, producing more light, and can act as your Key light. This light also features an in-line remote.
The light is powered by USB, but requires a power block (such as a regular iOS or Android phone adapter) to plug it into the wall which is not included.
Cost: $47-50
Looking for a more sophisticated, affordable lighting set up? Get both and use them as your key and fill lights!
Improve Your Framing
Head Room
Click through to compare “do” to “don’t” head room ⤴
Lead Room
For balance within your frames when recording in Zoom, you will want to leave space around yourself that sets a scene and provides visual “breathing room”.
Click through to compare “do” to “don’t” lead room ⤴
Rule of Thirds
The “Rule of Thirds” is the basic composition principle to follow for well balanced and interesting shots. The concept of the Rule of Thirds is to imagine breaking an image down into thirds horizontally and vertically. You will then want to frame your shot so that your elements are along the lines and preferably at one of the four points where the lines intersect to make your shot more interesting.
Click through to see how shot framing can draw interest ⤴
Improve Your Audio
Compare what to do and not do with these two examples ⤴
Be aware of background noise that will end up in your recording. Background noise you do not want can not be fixed easily, even when editing your Zoom video. Audio quality is far more important than most would think since without good audio it will be difficult understand your video.
Starter Microphones
 Jounivo USB Mic (Cardioid)
- This USB microphone uses a cardioid pick-up pattern which captures sound sources that are directly in front of the microphone, reducing background noise. It delivers a rich, full-bodied sound and is well-suited for podcasting, Zoom meetings, and voice recording.
- A fully adjustable metal gooseneck pipe makes positioning the microphone for the best possible sound effortless.
- Use one-click to mute/unmute the microphone. A green/red led indicator light reminds you which setting it’s on.
- Plug into your computer’s USB port and start using it with no downloads or installation.
Tutorials
Cost: $19-25
This mic is recommended at this price point, but if it’s not currently available, the mic below is a suitable alternative.
 ZekPro USB Mic (Omnidirectional)
- This small USB microphone is a convenient enhancement for voice recording, podcasting, and Zoom meetings. Its omnidirectional pick-up pattern records 360º of sounds which may result in background noise.
- Easily adjust the microphone by its fully adjustable metal gooseneck pipe into a recording position or flat for storage.
- Use one-click to mute/unmute the microphone. Its blue indicator light reminds you which setting it’s on.
- Plug into your computer’s USB port and start using it with no downloads or installation.
- A travel bag and wind foams are included.
Tutorials
Cost: $19-26
Specialized Audio

Blue Snowball Condenser Microphone
The same as would be found at many Media Commons editing stations, these microphones do a great job of recording audio for voiceover narration as well as live audio in Zoom sessions. There are three different recording options for speaking, music and meetings, as well.
Tutorials
Cost: $70-90
Improve Your Background

You don’t want your background to be distracting when you’re in a Zoom meeting or recording a presentation. Don’t position yourself in front of a window or with a mess behind you.
If you don’t have an appropriate space to use as a background, put yourself in front of a blank wall or try using a Virtual Background.
Using (and Making) Virtual Backgrounds
 The virtual background feature allows you to display an image or video as your background during a Zoom Meeting. You can upload your own images or videos as a virtual background, taking the place of green screen in the One Button Studio (with similar results).
Tutorials
Note: If the background conflicts with your movements – or lack thereof, you may be better served by another one or without it.
Recording + Sharing
Recording and Retrieving Zoom Presentations
This tutorial will walk you through recording and retrieving a Zoom presentation.
Zoom is a web application and is accessed at psu.zoom.us. To start your session for recording, go to log in using your Penn State user ID and password.
Once you’re logged in and started your meeting, you will be want to press Record in your Zoom room.

After you click the Record button, a pop-up window will ask if you want to Record this meeting to the cloud. Click Continue.

A notice will appear in the top left corner of your Zoom room. It indicates that you are currently Recording the session. You have the ability to pause and stop the recording from this call out.

When you are finished with your presentation press the square Stop button. Another pop-up window will ask if you want to Stop Cloud Recording. Click Stop Recording.

Your meeting recording will be uploaded and processed. When it is ready for playback and sharing, you will receive an email with download links.
Access Zoom Cloud Recordings (IT Knowledge Base)
Sharing a Link to Your Media File (IT Knowledge Base)
Pitch Videos
Share a business plan, your research findings or new product idea by recording a great elevator pitch using Zoom. Upload your recording to YouTube and share via Adobe Spark, allowing potential partners or collaborators to learn more – or publish to Kaltura and turn in through Canvas for in-class assignments.

Getting Started
Check out the Key Ingredients to a Pitch Perfect pitch video ⤴
Set Up Your Meeting
Schedule Meetings (Zoom Support)
Invite Others (Optional)
Inviting Others to Join a Meeting (Zoom Support)
Prepare to Record
Improve Your Lighting
The industry standard studio lighting set-up is 3 point lighting using 3 dedicated lights. At home, the same technique applies, even as the 3 lights become 3 light sources of various types. Whenever possible, ensure the light sources are 45º angles above the subject (you).
High Contrast + Low Light
Keep lighting in mind when choosing shooting locations. Having bright light behind a subject will be distracting and will discolor or “backlight” what you aim to shoot. A camera with auto exposure will compensate for the bright backlight and will leave your subject in the dark.
At Home Lighting Gear
 LED Light Ring (Reading Light)
This clip on light offers ten levels of brightness in warm (incandescent), cool (natural) and mixed options, allowing you to adjust your key light source to offset or match the lighting in your home office, living room, etc. An in-line remote makes changing lighting on the fly simple.
The light is powered by USB, meaning it can be plugged into an open port on your computer or into the wall using a regular iOS or Android phone adapter that you have on-hand.
Cost: $20-25
 LED Selfie Ring Light (with Stand)
This rotatable ring light also offers ten levels of brightness in warm (incandescent), cool (white), and natural (mixed). This ring light is mounted on an adjustable-height stand and is larger, producing more light, and can act as your Key light. This light also features an in-line remote.
The light is powered by USB, but requires a power block (such as a regular iOS or Android phone adapter) to plug it into the wall which is not included.
Cost: $47-50
Looking for a more sophisticated, affordable lighting set up? Get both and use them as your key and fill lights!
Improve Your Framing
Head Room
When a you are the main subject of a shot like in Zoom, make sure that there is a small amount of space above your head. You don’t want too much space, but you don’t want to cut off your head either.
Click through to compare “do” to “don’t” head room ⤴
Lead Room
For balance within your frames when recording in Zoom, you will want to leave space around yourself that sets a scene and provides visual “breathing room”.
Click through to compare “do” to “don’t” lead room ⤴
Rule of Thirds
The “Rule of Thirds” is the basic composition principle to follow for well balanced and interesting shots. The concept of the Rule of Thirds is to imagine breaking an image down into thirds horizontally and vertically. You will then want to frame your shot so that your elements are along the lines and preferably at one of the four points where the lines intersect to make your shot more interesting.
Click through to see how shot framing can draw interest ⤴
Improve Your Audio
Compare what to do and not do with these two examples ⤴
Be aware of background noise that will end up in your recording. Background noise you do not want can not be fixed easily, even when editing your Zoom video. Audio quality is far more important than most would think since without good audio it will be difficult understand your video.
Starter Microphones
 Jounivo USB Mic (Cardioid)
- This USB microphone uses a cardioid pick-up pattern which captures sound sources that are directly in front of the microphone, reducing background noise. It delivers a rich, full-bodied sound and is well-suited for podcasting, Zoom meetings, and voice recording.
- A fully adjustable metal gooseneck pipe makes positioning the microphone for the best possible sound effortless.
- Use one-click to mute/unmute the microphone. A green/red led indicator light reminds you which setting it’s on.
- Plug into your computer’s USB port and start using it with no downloads or installation.
Tutorials
Cost: $19-25
This mic is recommended at this price point, but if it’s not currently available, the mic below is a suitable alternative.
 ZekPro USB Mic (Omnidirectional)
- This small USB microphone is a convenient enhancement for voice recording, podcasting, and Zoom meetings. Its omnidirectional pick-up pattern records 360º of sounds which may result in background noise.
- Easily adjust the microphone by its fully adjustable metal gooseneck pipe into a recording position or flat for storage.
- Use one-click to mute/unmute the microphone. Its blue indicator light reminds you which setting it’s on.
- Plug into your computer’s USB port and start using it with no downloads or installation.
- A travel bag and wind foams are included.
Tutorials
Cost: $19-26
Specialized Audio

Blue Snowball Condenser Microphone
The same as would be found at many Media Commons editing stations, these microphones do a great job of recording audio for voiceover narration as well as live audio in Zoom sessions. There are three different recording options for speaking, music and meetings, as well.
Tutorials
Cost: $70-90
Improve Your Background

You don’t want your background to be distracting when you’re in a Zoom meeting or recording a presentation. Don’t position yourself in front of a window or with a mess behind you.
If you don’t have an appropriate space to use as a background, put yourself in front of a blank wall or try using a Virtual Background.
Using (and Making) Virtual Backgrounds
 The virtual background feature allows you to display an image or video as your background during a Zoom Meeting. You can upload your own images or videos as a virtual background, taking the place of green screen in the One Button Studio (with similar results).
Tutorials
Note: If the background conflicts with your movements – or lack thereof, you may be better served by another one or without it.
Recording + Sharing
Recording and Retrieving Zoom Presentations
This tutorial will walk you through recording and retrieving a Zoom presentation.
Zoom is a web application and is accessed at psu.zoom.us. To start your session for recording, go to log in using your Penn State user ID and password.
Once you’re logged in and started your meeting, you will be want to press Record in your Zoom room.

After you click the Record button, a pop-up window will ask if you want to Record this meeting to the cloud. Click Continue.

A notice will appear in the top left corner of your Zoom room. It indicates that you are currently Recording the session. You have the ability to pause and stop the recording from this call out.

When you are finished with your presentation press the square Stop button. Another pop-up window will ask if you want to Stop Cloud Recording. Click Stop Recording.

Your meeting recording will be uploaded and processed. When it is ready for playback and sharing, you will receive an email with download links.
Access Zoom Cloud Recordings (IT Knowledge Base)
Sharing a Link to Your Media File (IT Knowledge Base)


