
This tutorial will show you how to adjust microphone settings on a Media Commons iMac or any other mac computer.
- Make sure the audio source is connected to the computer.
- Click the Apple logo in the menu bar at the top of your screen and select System Preferences.
- Click the Sound icon.
- Select the Input tab at the top of the dialog box.
- Select your desired microphone from the list.
NOTE: If you are recording in the Media Commons, you will want to select the Blue Snowball microphone from this list.
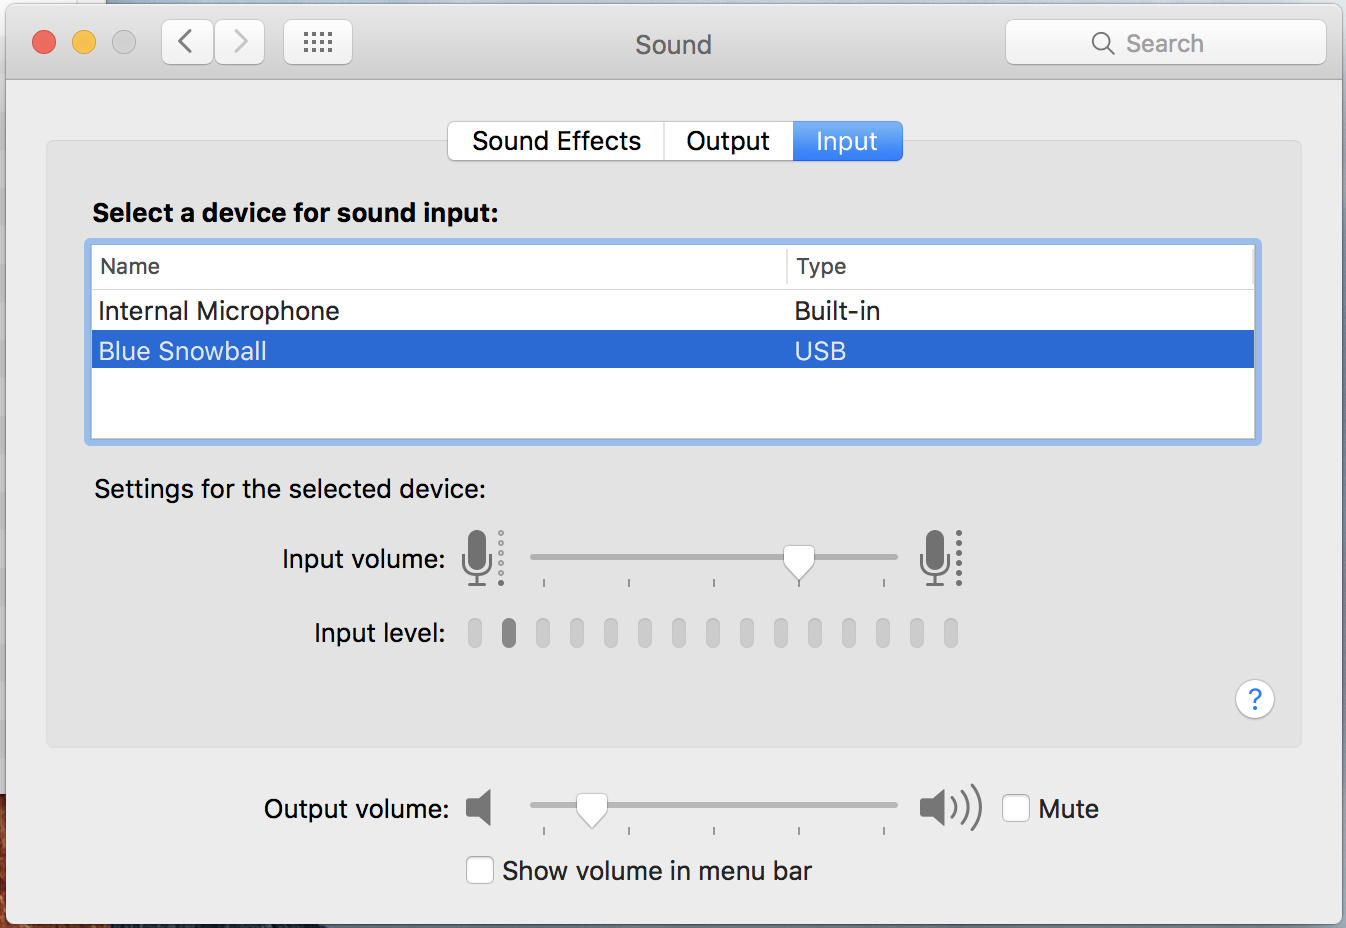
- Set the Input Volume slider bar all the way to the left.
- Start by speaking into your microphone at a comfortable level.
The input level monitor bar should fluctuate according to the sound levels being taken from the audio source.
- Slowly move the input volume slider to the right until the sound level is approximately loud enough.
To determine what loud enough actually is, the input level monitor bar should not rise above approximately 3/4 of its maximum width. If it goes greater than that, the volume is too loud, and the recording will probably experience clipping. This may cause the quality of the recording to be poor.
Note: If there is no sound coming from the audio source, the bar will not move.
- Once your volume is at the right level, you can close the System Preferences.