This tutorial covers 3 methods you can use to fix playback issues in Adobe Premiere Pro.
Change the File Type to .dif
Digital video is sometimes recorded with a Variable Frame Rate (VFR). This can cause the MP4 file audio to play out of sync when editing in Adobe Premiere. Instead of being an exact frame rate like film at 24 frames per second (fps) or 30fps, the camera can save the video at rates like 29.910988 or 29.970030 to save space. This normally does not present an issue because iMovie and Final Cut automatically compensate and re-render the video at a Constant Frame Rate (CFR). Adobe Premiere does not do this automatically, so you can run into playback differences that are dependent upon your video source.
This is related to not reading part of the mp4 file during import. If the file type is changed to .dif instead of .mp4, this will cause Premiere to read it correctly.
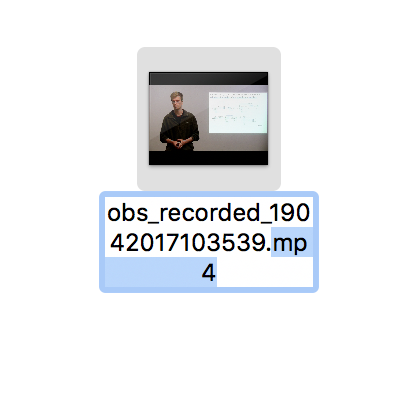
- Single click on the file and press Enter on the keyboard to edit the file name.

- Change .mp4 to .dif.
- Press Enter to finish editing the name.
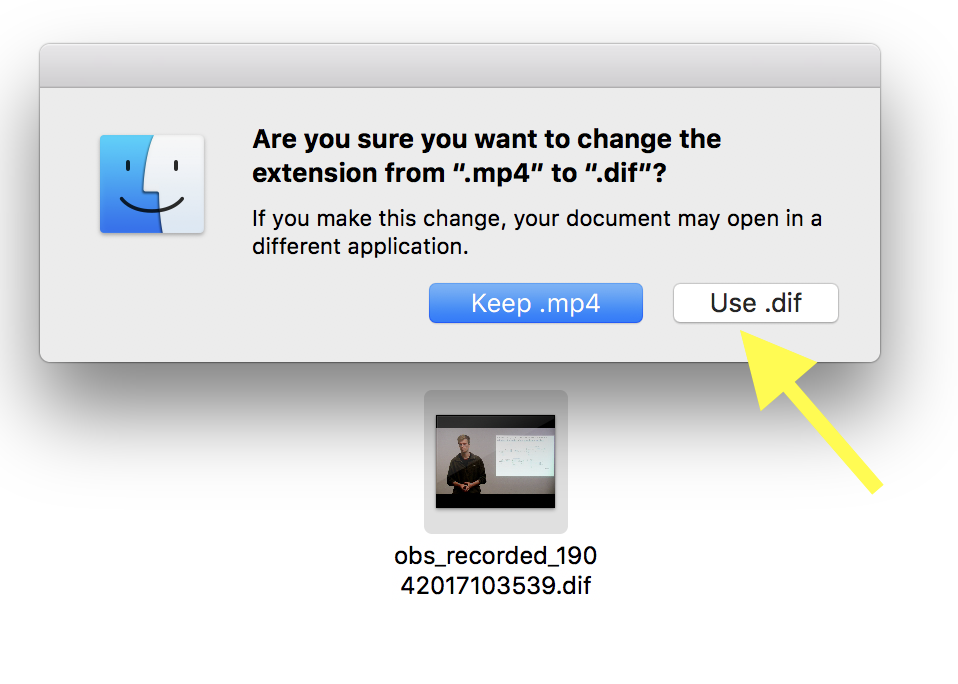
- Click Use .dif to finish changing the suffix.

Convert Video with Handbrake
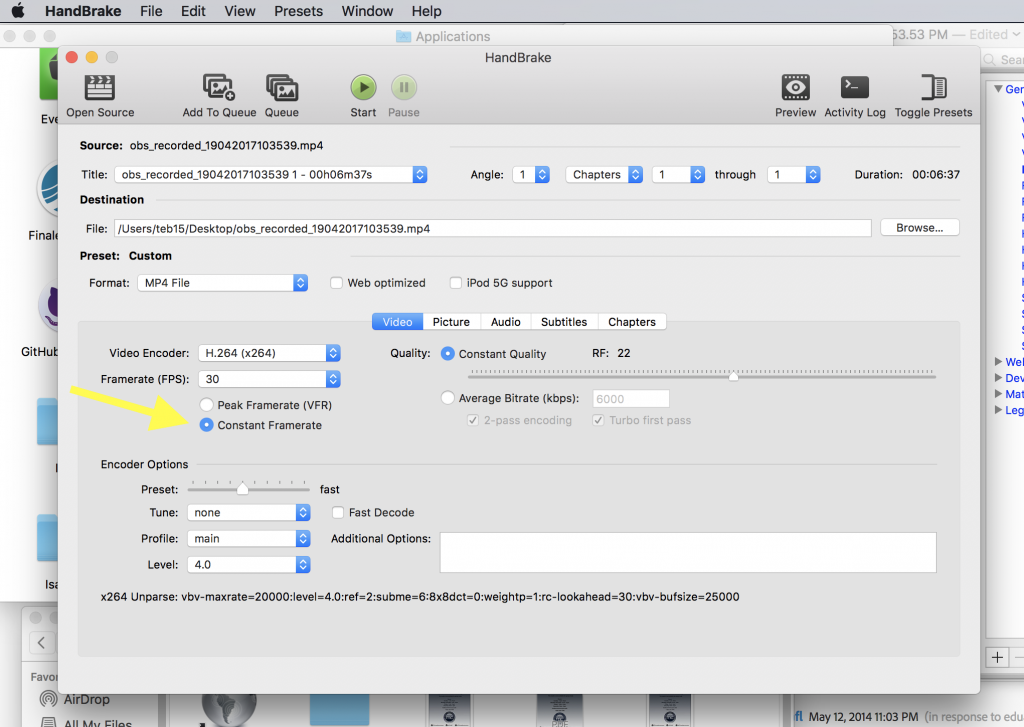
If changing the suffix to .dif doesn’t work, another way to fix this is to convert your video with Handbrake set to a Constant Frame Rate (CFR) before importing it into Premiere.

Premiere Pro Audio Preferences
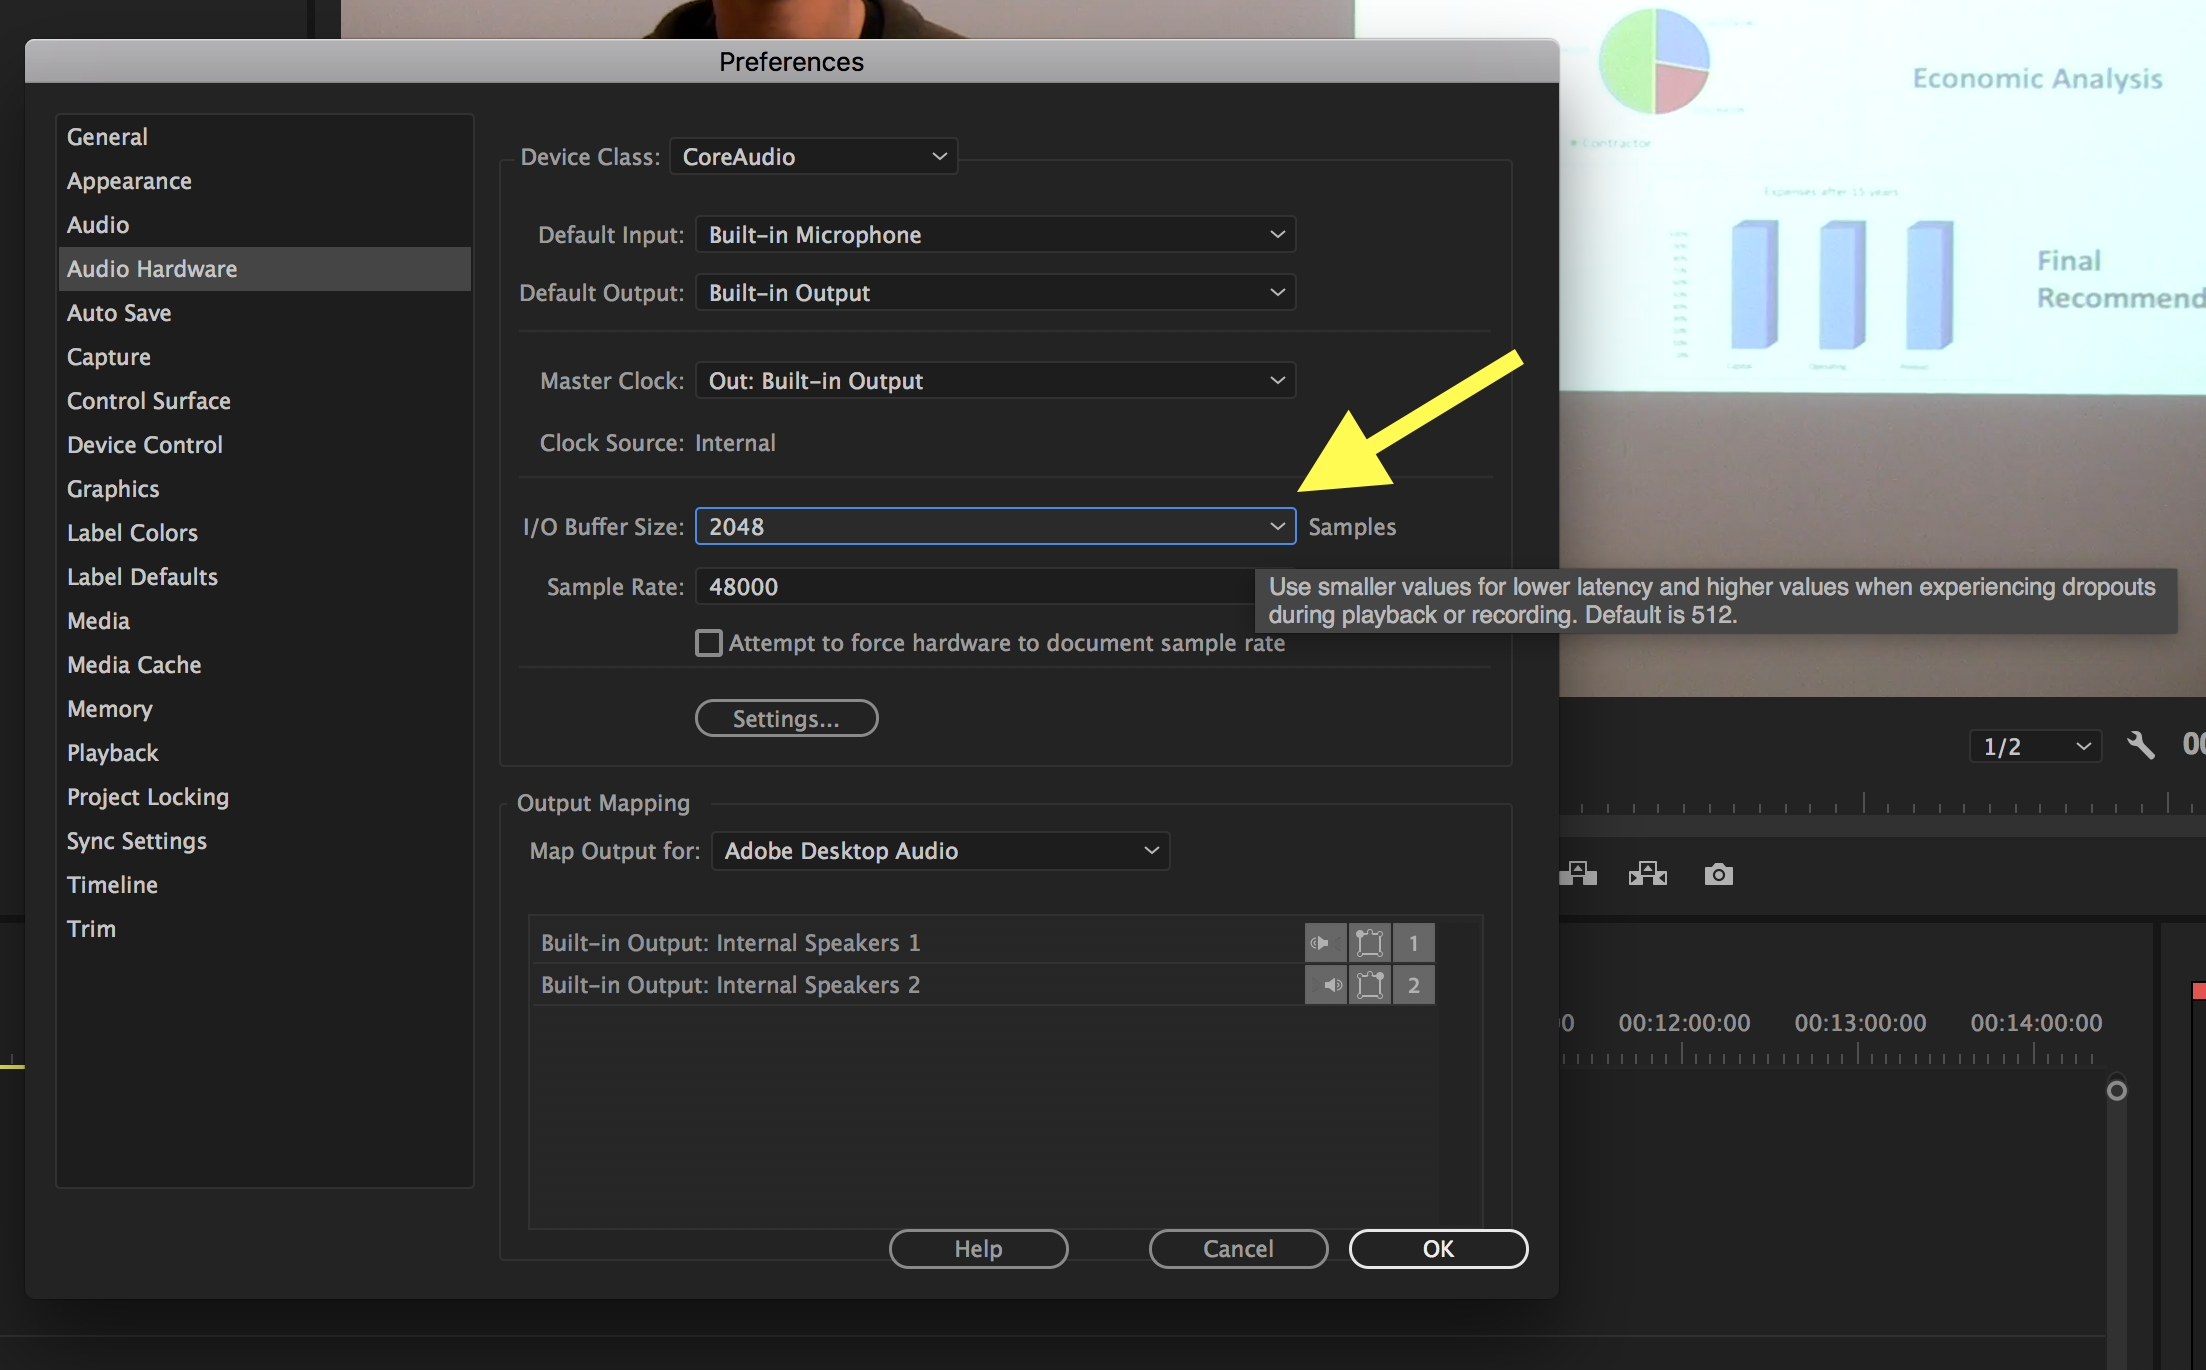
There is also a setting in the Adobe Premiere Audio Preferences that can improve audio playback.
Increasing the I/O Buffer Size to 2048 will make more RAM available to playback audio which should help keep things synced.

