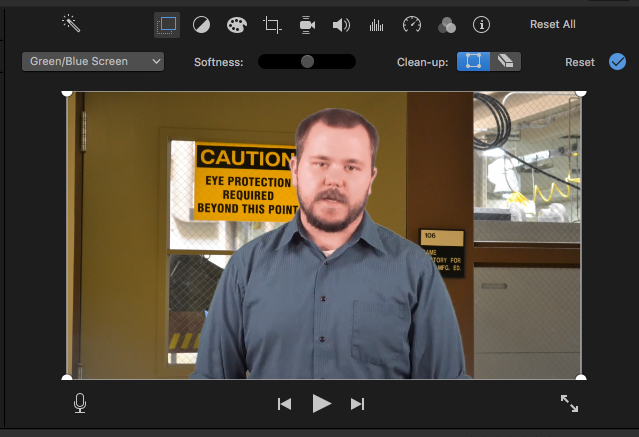
This tutorial will guide you through the process of using green screen in iMovie.
To use your green screen footage in a bigger project, first edit it the following way, export it, and then import the new file. Not doing so will cause you to be unable to use cutaways, text, or transitions with your green screen footage.
- Open an empty project.
- Select the background you would like to use.
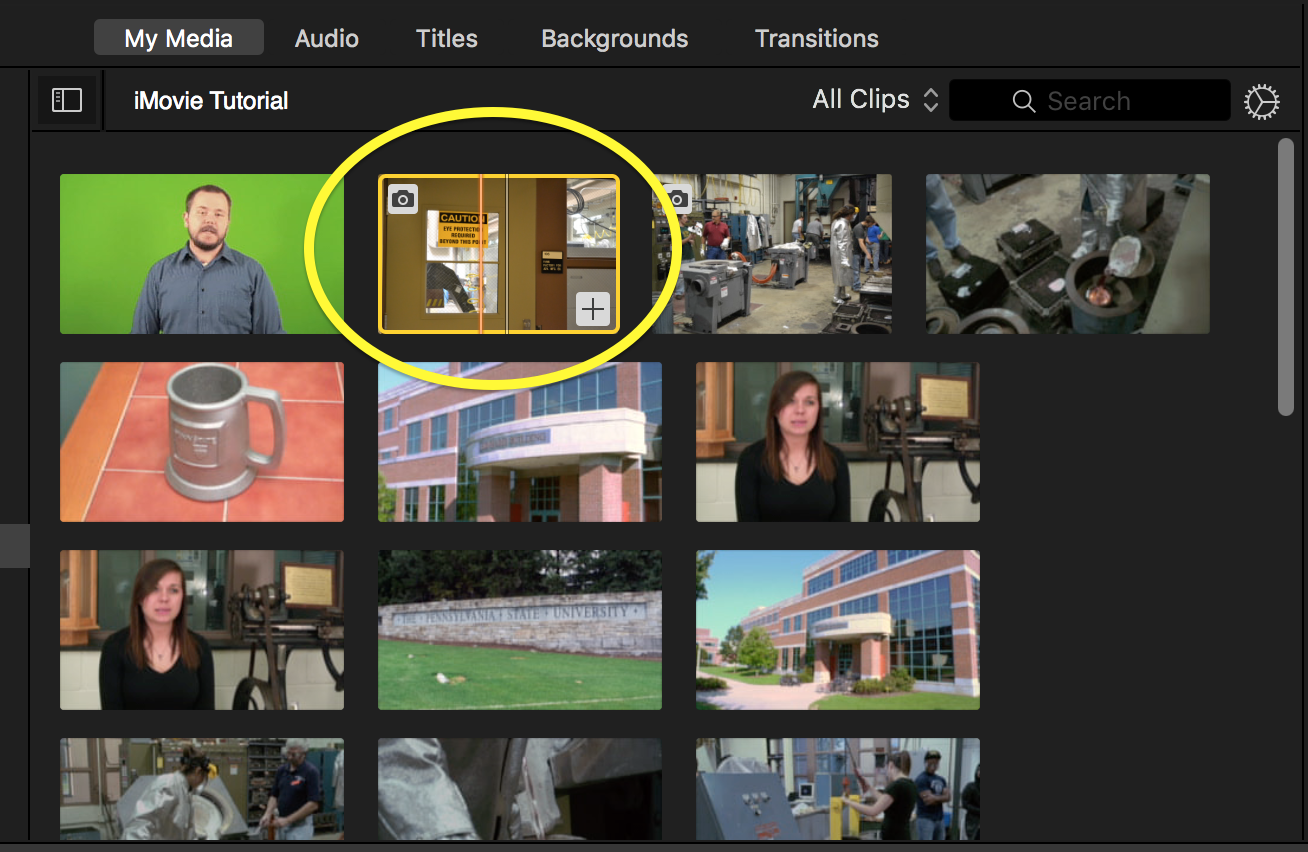
- Drag and drop the background video or image into the timeline.
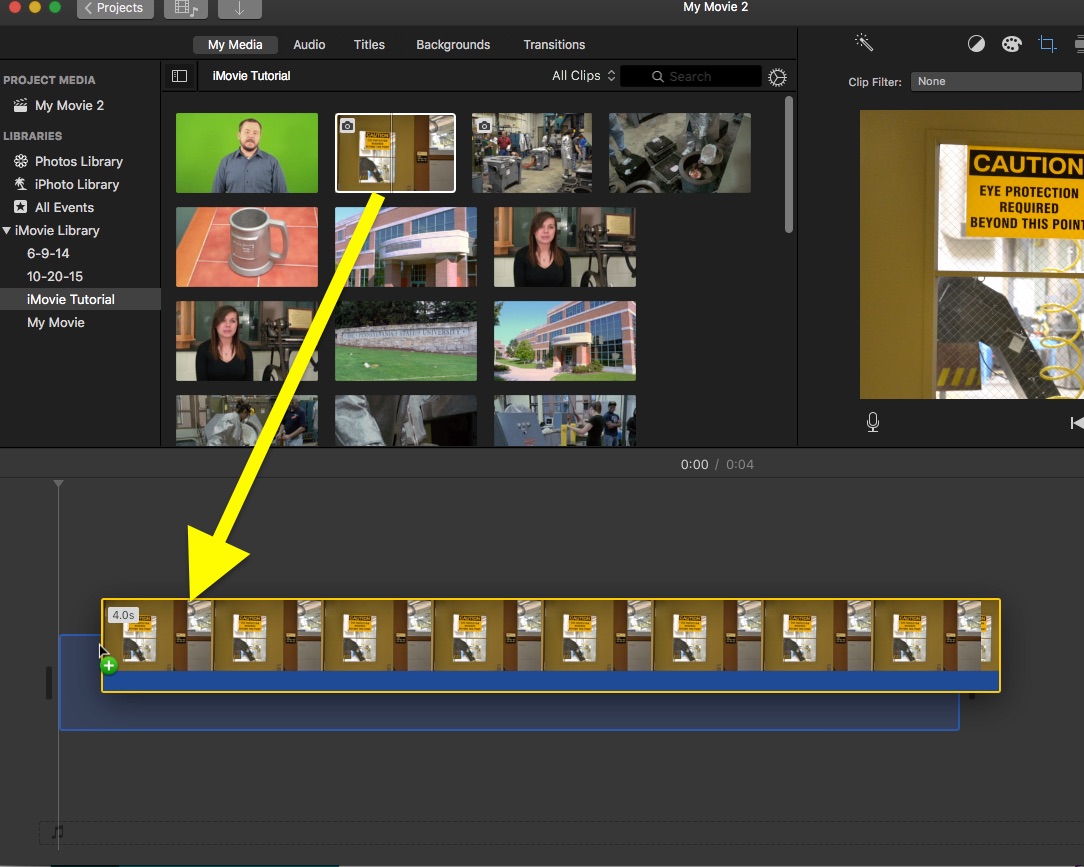
- Select the green screen footage you want to use.
- Drag and drop it above the background.
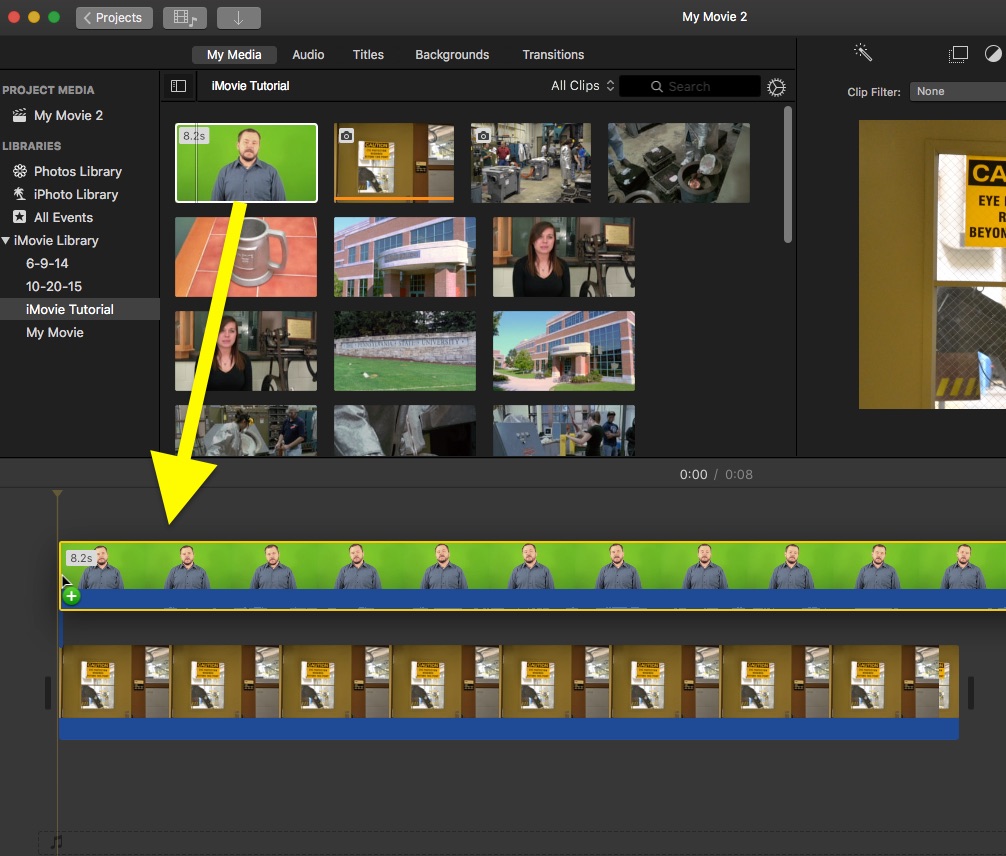
- Drag the edge of the background to make the background longer or shorter to match your green screen footage.
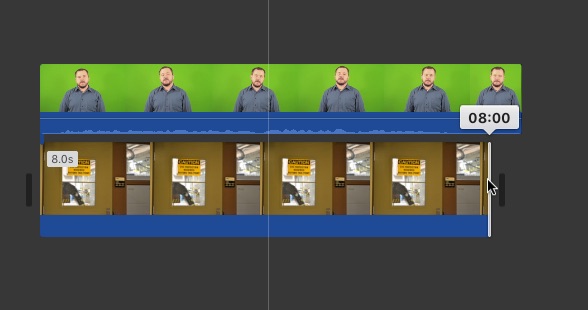
- Click to select the green screen footage in the timeline
- Select Green/Blue Screen from the drop down menu that defaults to Cutaway above the left corner of the viewer window.
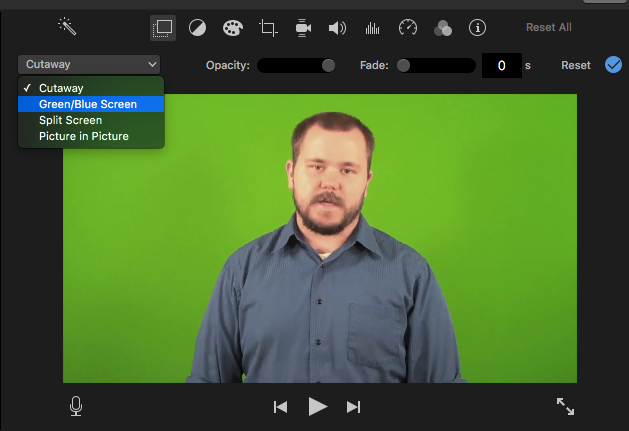
The green should now be removed to reveal the background behind it.
