This tutorial will show you how to prepare to use the M-Audio mixer box with microphones to record a podcast.
Connecting the M-Audio Box
- Make sure the microphones are plugged in to the M-Audio box (using the XLR connections).
- Plug the M-Audio box into the computer using the provided USB cable.
- Make sure the box is powered on, the Phantom Power switch on the M-Audio Box is turned on, and the red light beside it is lit up.
- Check to make sure the Channel 1 and Channel 2 volume knobs are at mid range.
Setting Up the Mac
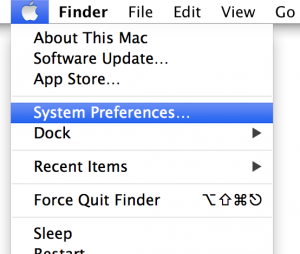
- Go to System Preferences by selecting the Apple icon and choosing System Preferences…

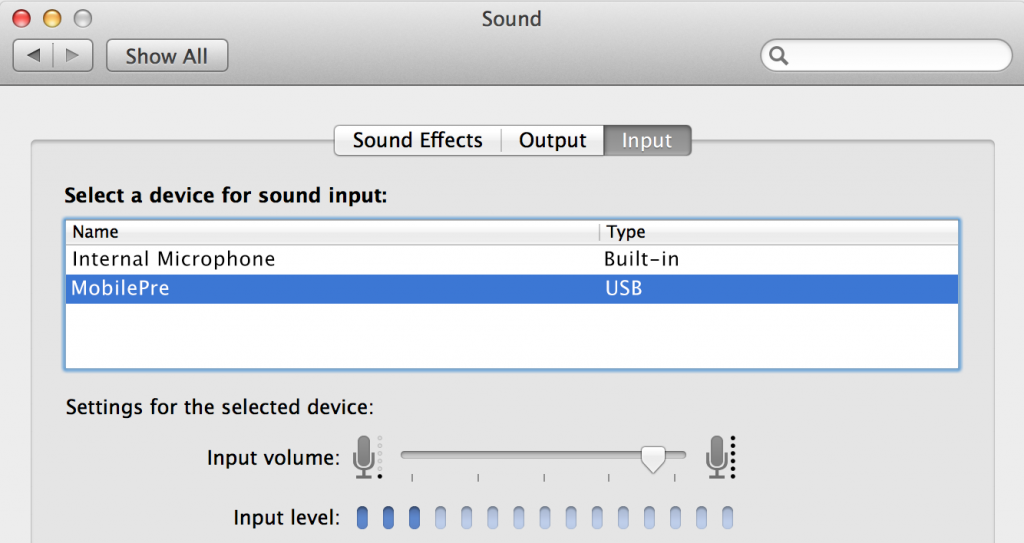
- Then click the Sound icon, designated by a picture of a speaker.

- Here you will go to the Input tab at the top of the window and choose Mobile Pre USB. The input volume should be set to about 70% (we can further adjust the volume using the M-Audio Box volume knobs later).

Setting Up GarageBand
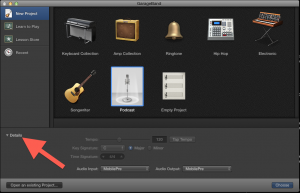
- Open the GarageBand application and select the Podcast template.
- Click the Details drop down in the lower left-hand corner of the window. Some more options will appear below.

- Make sure Audio Input is set to MobilePre. If it’s not, simply click in the drop-down box and select it.
NOTE: If Audio Output is set to MobilePre, you will need headphones plugged into the M-Audio box in order to hear your recording. If you don’t have headphones or want to listen through the built-in speakers, the audio output settings will have to be changed in System Preferences.
- Click Create in the lower right-hand corner of the window, and your project will be created. Now you are ready to record audio in GarageBand.
Tip: If you are the only person speaking in your podcast, set both microphones up in front of you to get a stereo effect.
