To be able to use your video outside of iMovie you need to Export it. One it has been exported as a self-contained file you can put it on a flash drive, upload it to YouTube, or upload it to any cloud-storage you may have.
- Select File in the menu bar.
- Hover over Share and then select File.
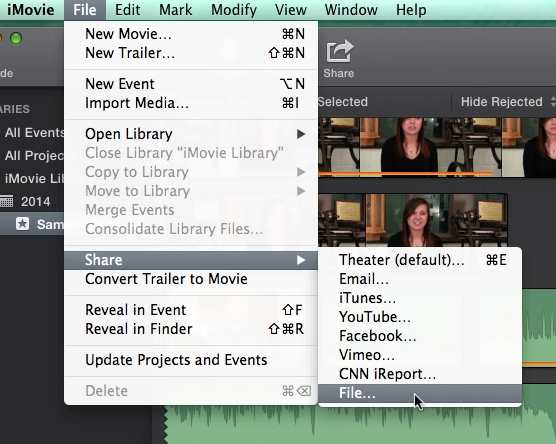
The Exporting options dialog box will open.
- If you are using a Lab computer uncheck the box next to Add to Theater.
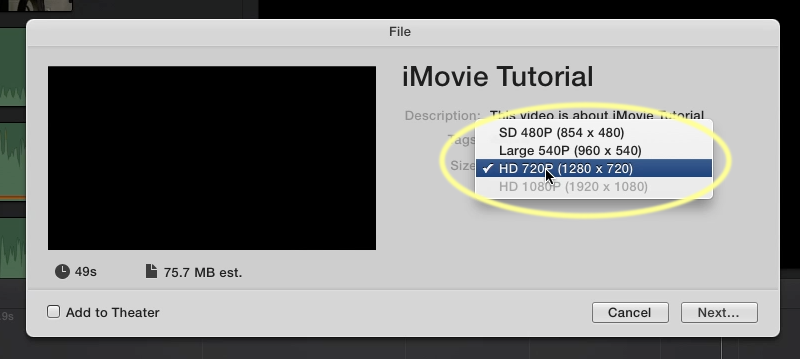
- Change the export size of your video if desired by clicking the current size next to where it is labeled Size.
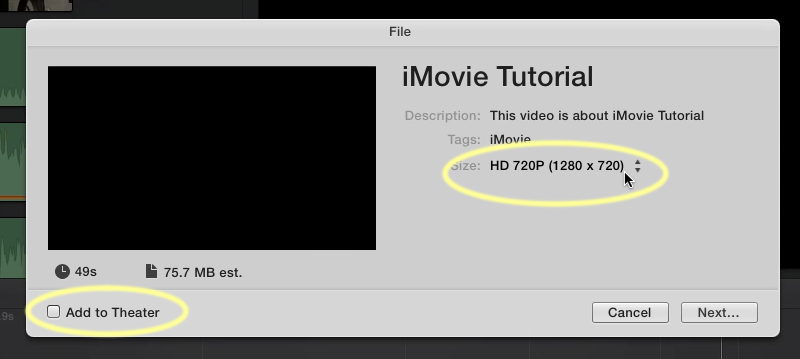
The size, or resolution, will effect how big your exported file is and how long it takes to export. You generally will want to use the Large size but one of the HD options would be better if possible.
- Choose the size you want or leave it as the default and click Next.
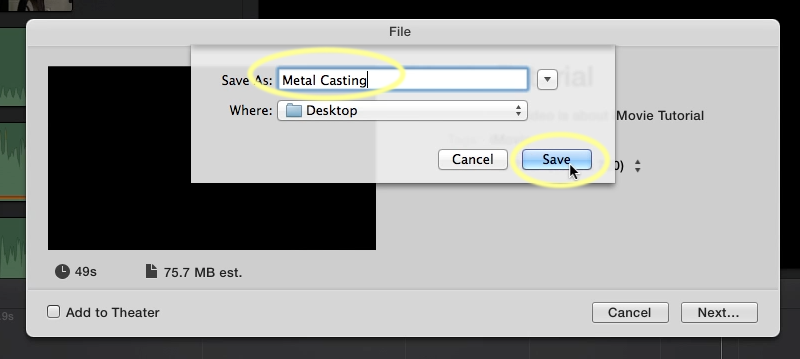
Now you can change where your file will be saved.
- Click where it says Documents to get the drop down of where else to save it; Desktop is a good place to make your file easy to find.
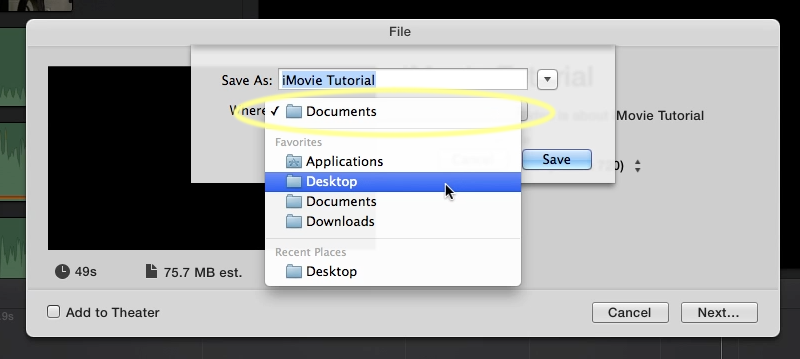
- Change the file name if you want to and then click Save.
While it is exporting a small blue circle in the upper right hand corner of iMovie will show the progress of your export. A notification will pop up when it is complete.

